
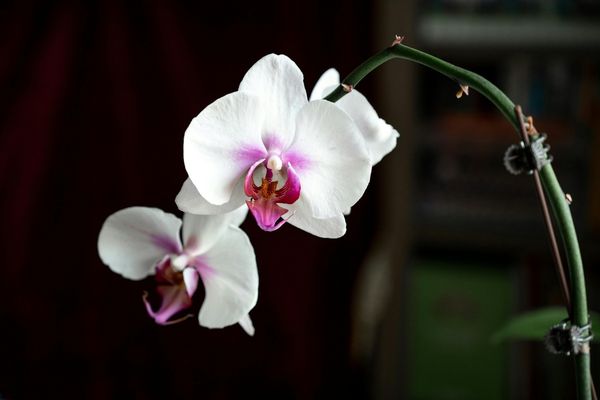
Orchids are often seen as delicate and difficult plants, but with the right care, they can thrive and reward growers with long-lasting, elegant blooms. In reality, orchids are not fragile—they simply have specific needs that differ from common houseplants. Understanding these needs is the key to successful orchid care. This article presents essential orchid care tips to help your plants grow strong, healthy, and flower year after year.
Understanding Orchids and Their Natural Habitat
Orchids are a diverse family of plants found in many climates around the world, but most commonly grown indoor orchids, such as Phalaenopsis, are epiphytes. This means they grow attached to trees rather than in soil. Their roots are adapted to absorb moisture and nutrients from the air and rain, which explains why traditional potting soil is unsuitable for them.
Knowing this natural growth habit helps explain many orchid care requirements, including the need for excellent airflow around the roots and careful watering practices.
Light: A Critical Factor for Blooms
Light is one of the most important factors in orchid care. Orchids need bright, indirect light to grow well and produce flowers. A location near an east- or north-facing window is often ideal. South- or west-facing windows can also work if the light is filtered with a sheer curtain.
Too little light will result in healthy-looking leaves but no blooms, while too much direct sunlight can scorch the leaves, causing yellow or brown patches. A good indicator of proper light is leaf color—healthy orchid leaves should be a medium green, not dark green or pale yellow.
Proper Watering Techniques
Watering is where many orchid growers go wrong. Orchids do not like to sit in water, and overwatering is the most common cause of orchid failure. Instead of watering on a strict schedule, it is best to water based on the plant’s needs.
Most orchids should be watered once every 7 to 10 days, allowing the potting medium to dry slightly between waterings. When watering, thoroughly soak the roots, then allow all excess water to drain away. Never let orchids stand in water, as this leads to root rot.
Using room-temperature water is recommended, and if possible, use rainwater or filtered water, since orchids can be sensitive to chemicals found in tap water.
Choosing the Right Potting Medium and Container
Because orchids do not grow in regular soil, they require a specialized potting medium. Common orchid mixes include bark chips, sphagnum moss, charcoal, or a combination of these materials. These media provide excellent drainage and airflow, which orchid roots need to stay healthy.
Clear plastic pots are popular for orchids because they allow you to observe root health and moisture levels. Healthy roots are typically green or silvery, while brown, mushy roots indicate overwatering or poor drainage. Always choose pots with drainage holes to prevent water accumulation.
Temperature and Humidity Requirements
Most popular orchids thrive in temperatures similar to those found in homes, typically between 18°C and 27°C during the day, with slightly cooler temperatures at night. A small drop in nighttime temperature can actually help trigger flowering in many orchid species.
Humidity is another important factor. Orchids prefer humidity levels between 40% and 70%. In dry environments, humidity can be increased by using a humidity tray, grouping plants together, or running a humidifier. Light misting can help, but it should not replace proper watering.
Fertilizing for Healthy Growth
Orchids benefit from regular, light feeding. A common recommendation is to “fertilize weakly, weekly,” meaning you use a diluted orchid fertilizer more frequently rather than a strong dose occasionally. During active growth, fertilize every two to three weeks with a balanced orchid fertilizer diluted to half strength.
Flush the potting medium with plain water once a month to remove salt buildup, which can damage orchid roots. Reduce fertilization during periods of rest or slower growth.
Repotting and Root Care
Orchids should be repotted every one to two years, or when the potting medium breaks down and becomes compacted. Repotting is best done after flowering, when the plant enters a growth phase.
During repotting, remove old, decomposed medium and trim away dead or rotting roots with sterilized scissors. Healthy roots should be firm and light-colored. Repotting refreshes the growing environment and encourages new root growth.
Encouraging Reblooming
After orchids finish flowering, many people are unsure what to do next. For Phalaenopsis orchids, you can cut the flower spike just above a node to encourage a secondary bloom, or cut it entirely to allow the plant to rest and store energy.
Consistent care, proper light, and slight temperature changes are key factors in encouraging orchids to bloom again.
Final Thoughts
Orchid care does not have to be intimidating. By understanding their natural habits and providing the right balance of light, water, humidity, and airflow, orchids can become reliable and rewarding houseplants. With patience and consistent care, your orchids will not only survive but flourish, producing beautiful blooms that last for months and bring elegance to any indoor space.