
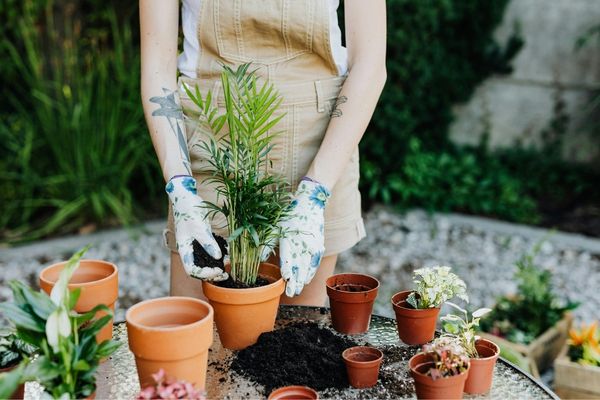
Repotting is an essential part of plant care, yet many plant owners feel anxious about doing it. The fear of breaking roots, stressing the plant, or causing long-term damage is common, especially among beginners. However, when done correctly, repotting actually supports healthier growth by giving roots more space, refreshing the soil, and improving drainage. Understanding the right timing, techniques, and aftercare will help you repot plants safely and confidently.
Why Repotting Is Important
Plants grow, and as they do, their root systems expand. Over time, roots can become crowded, forming a dense mass that restricts water and nutrient absorption. This condition, known as being root-bound, can stunt growth and weaken the plant. Repotting provides fresh soil, restores nutrient availability, and allows roots to spread naturally.
Repotting is also necessary when soil becomes compacted, depleted, or poorly draining. Fresh soil improves aeration and helps maintain a healthy root environment.
Knowing When to Repot
Timing plays a key role in reducing stress during repotting. The best time to repot most plants is during their active growing season, typically in spring or early summer. At this time, plants recover more quickly and establish new roots faster.
Signs that a plant needs repotting include:
- Roots growing out of drainage holes
- Water running straight through the pot
- Slowed growth
- The plant becoming top-heavy and unstable
Avoid repotting during dormancy or flowering, as plants are more vulnerable to stress during these periods.
Choosing the Right Pot
Selecting the correct pot is essential for successful repotting. The new pot should be only slightly larger than the current one—usually 2 to 5 centimeters wider in diameter. Moving a plant into a pot that is too large can lead to excess moisture in the soil, increasing the risk of root rot.
Always choose a pot with drainage holes. Proper drainage prevents water from accumulating at the bottom and protects roots from suffocation. The pot material also matters; terra-cotta pots allow better airflow, while plastic pots retain moisture longer.
Preparing the Soil and Workspace
Use a potting mix that matches your plant’s needs. Succulents and cacti require fast-draining soil, while tropical plants prefer richer, moisture-retentive mixes. Using the wrong soil type can cause stress even if the repotting process itself is done correctly.
Prepare your workspace in advance by having:
- Fresh soil
- The new pot
- Gloves
- Clean tools
Slightly watering the plant a day before repotting can help loosen the root ball and reduce breakage.
Removing the Plant Safely
To remove the plant, gently tilt the pot and support the base of the plant with your hand. Tap the sides of the pot or squeeze it lightly to loosen the root ball. Avoid pulling the plant by its stems or leaves, as this can cause damage.
Once the plant is out, examine the roots. Healthy roots are usually light-colored and firm. If the roots are tightly circling the pot, gently tease them apart with your fingers. This encourages outward growth in the new container.
Handling Roots with Care
Root handling is where many people worry about causing damage. Minor root disturbance is normal and usually harmless.
If you find dead, mushy, or rotting roots, trim them carefully with clean, sterilized scissors.
Avoid aggressively breaking or cutting healthy roots. The goal is to loosen them just enough to allow new growth. For severely root-bound plants, making a few small vertical cuts around the root ball can help stimulate healthy expansion.
Planting in the New Pot
Place a layer of fresh soil at the bottom of the new pot, then position the plant so it sits at the same depth as before. Planting too deep can suffocate the stem, while planting too high exposes the roots.
Fill in around the root ball with fresh soil, gently pressing it down to eliminate large air pockets. Do not compact the soil too tightly, as roots need air to grow.
Watering After Repotting
After repotting, water the plant thoroughly until excess water drains from the bottom. This helps settle the soil around the roots and reduces air gaps. However, avoid overwatering in the days following repotting, as roots need time to recover.
Some plants may appear slightly droopy after repotting. This is normal and usually temporary. Place the plant in a stable environment with indirect light and avoid fertilizing for at least two to four weeks.
Aftercare and Recovery
Proper aftercare helps ensure a smooth transition. Keep the plant out of direct sunlight for a few days, as intense light can increase stress. Monitor soil moisture closely and adjust watering as needed.
Signs of successful repotting include:
- New growth
- Improved stability
- Healthier leaves
With patience and attentive care, most plants recover quickly and benefit greatly from repotting.
Final Thoughts
Repotting does not have to be intimidating. By choosing the right time, using appropriate materials, and handling roots gently, you can repot plants without damaging them. This essential practice refreshes the growing environment and supports long-term plant health. With the right approach, repotting becomes a valuable step in helping your plants grow stronger, more vibrant, and better prepared for future growth.